Chapter 10
Reception screen
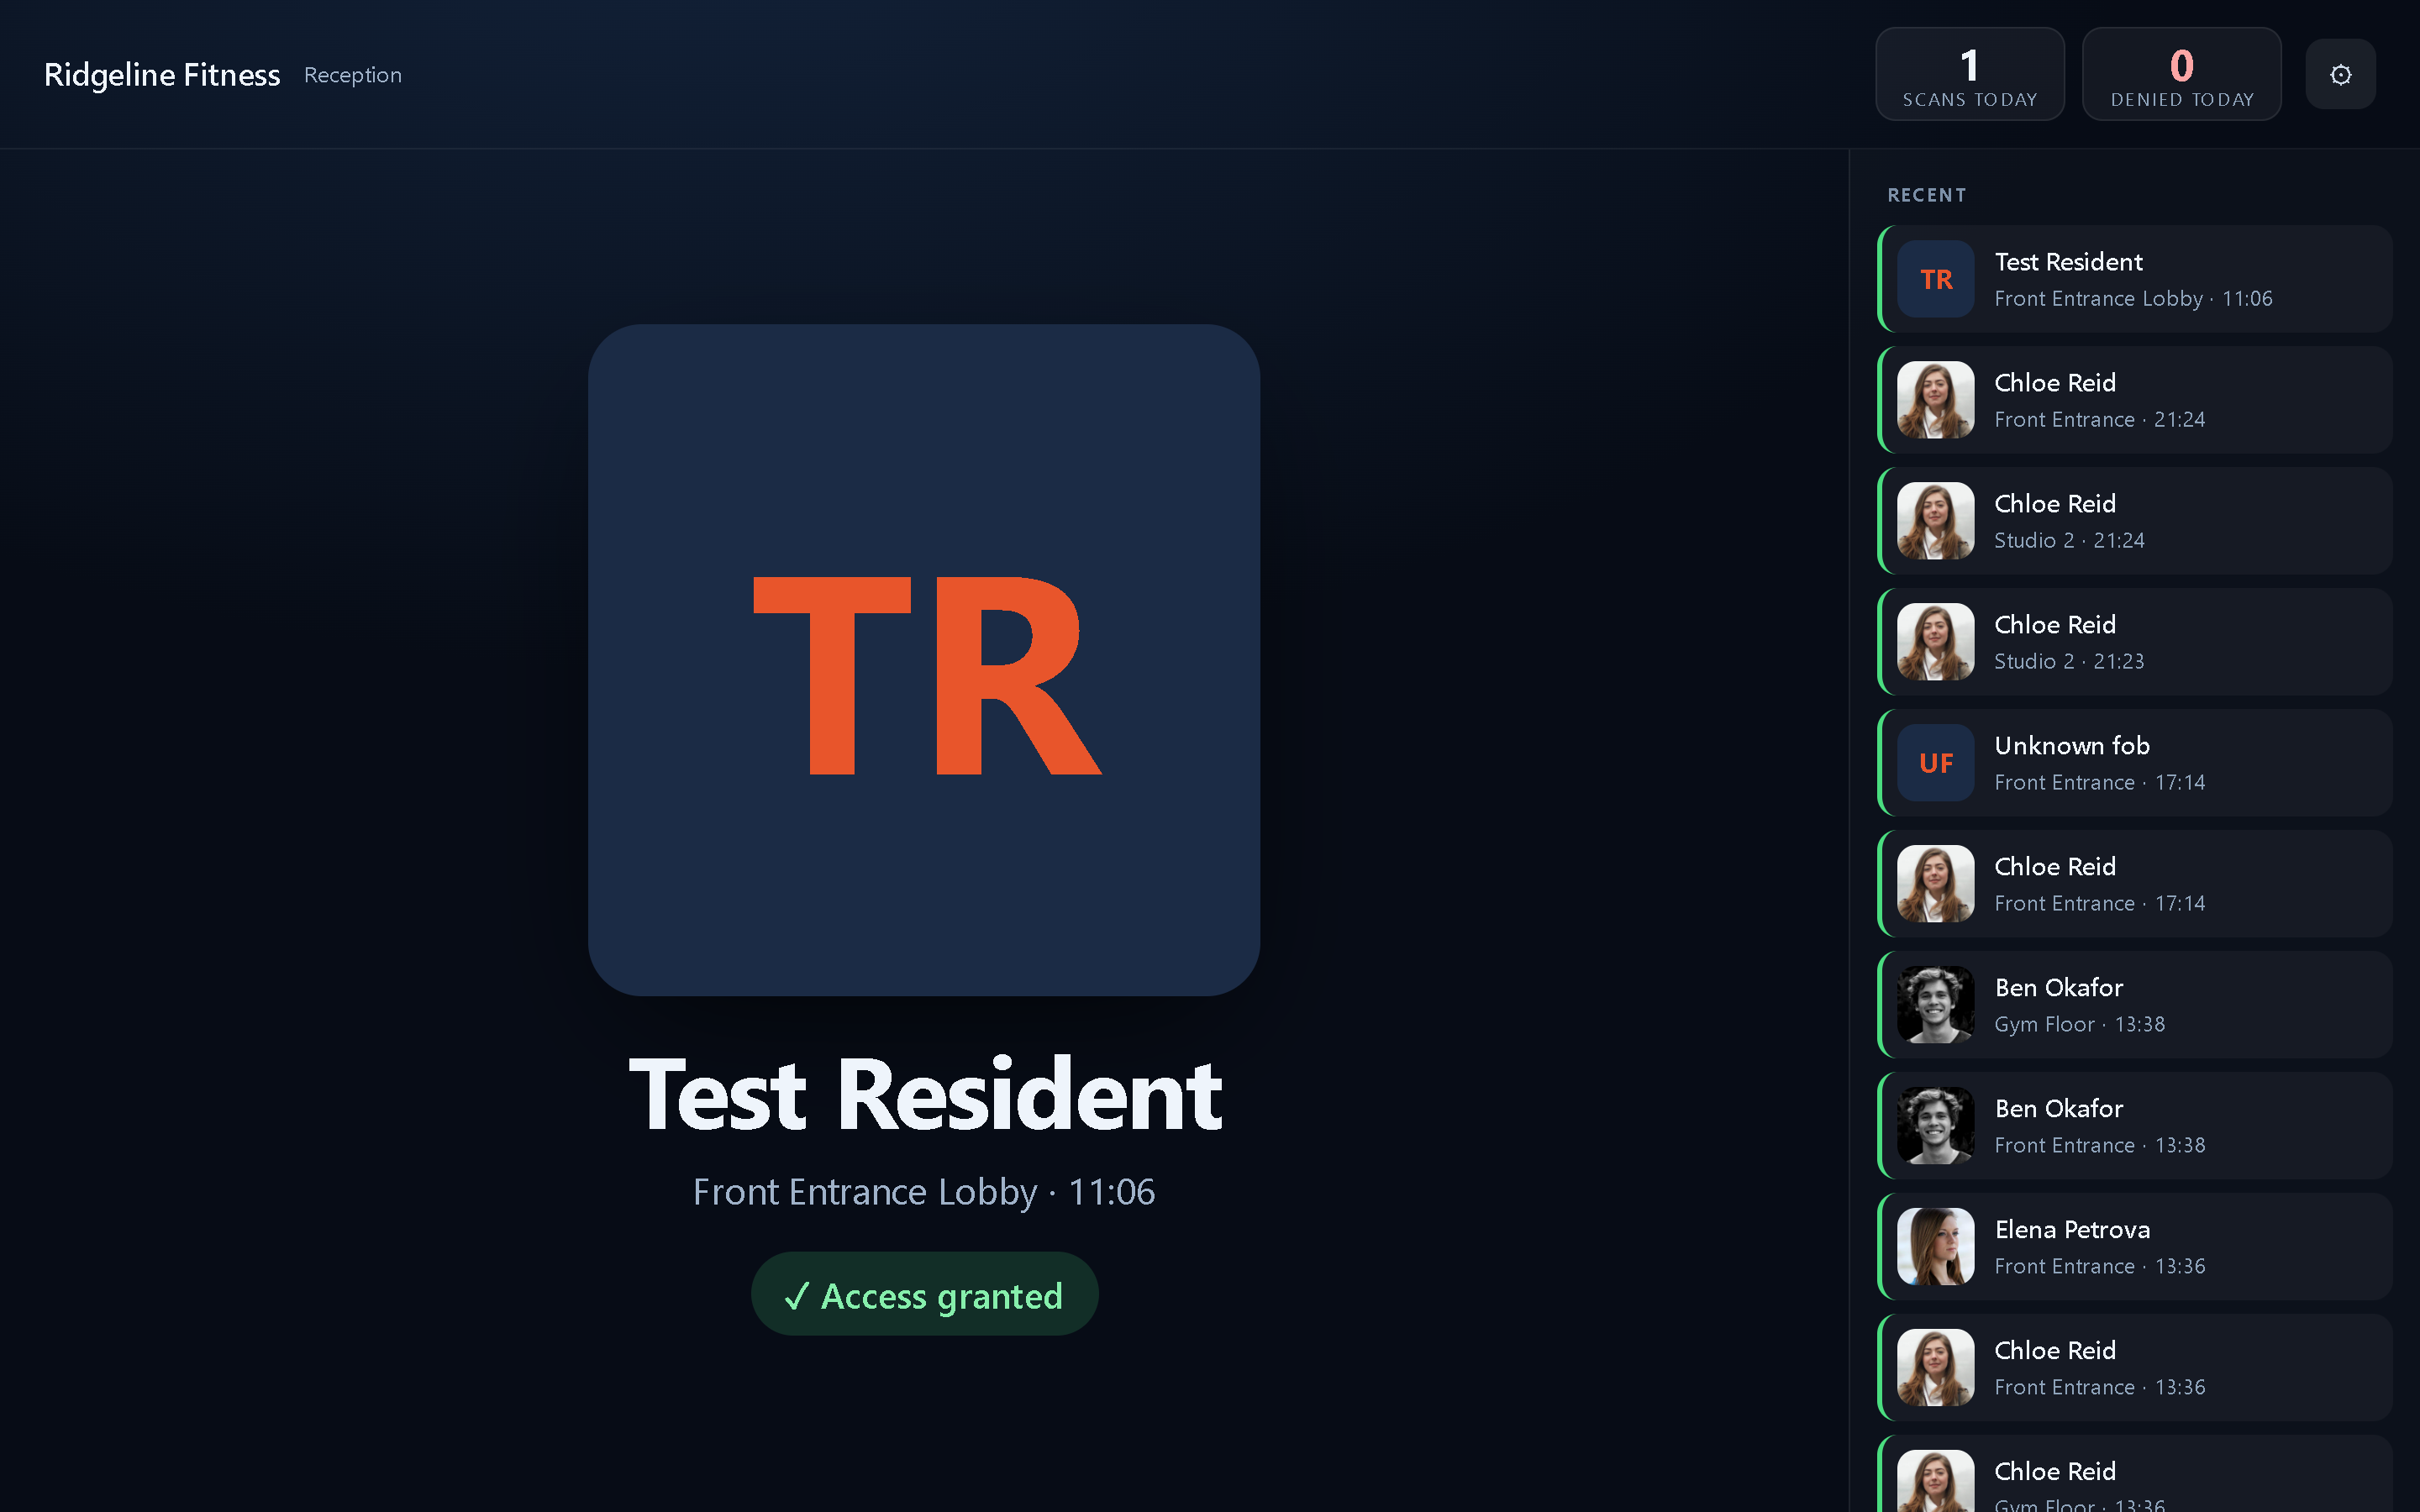
The reception screen is a full-screen web page for a laptop, tablet or wall monitor at the front desk. It shows each person's photo and name the moment they fob in, granted or denied, with the last dozen entries down the side and today's scan and denied counts at the top. Staff can greet people by name and spot a refused scan or an unfamiliar face immediately.
How it works
- The screen is a public page with a secret link. Nobody logs in on the front-desk machine; the link itself is the key. Anyone with the link can watch live entries and see people's photos, so treat it like a password.
- It updates every 2.5 seconds and shows access events only (not door open/close, exit-button, alert or system events). Fob scans and phone releases show the person; a remote unlock from the panel has no person and appears as a granted "Unknown fob" entry, as does a genuinely unknown fob. Exit-button presses are door events and are not shown.
- Photos come from the People pages (chapter 6); people without a photo show their initials.
- It uses the tenant's accent colour from Branding and always uses a dark theme suited to a screen that is on all day.
Setting up a screen
- Sign in to the panel on the reception computer, open Doors, and in the Reception screen panel press Open screen (or Copy the link and paste it into the browser). Then sign out of the panel; the screen keeps working.
- Put the browser into full-screen or kiosk mode (F11 in most browsers). On Windows you can create a shortcut that starts the browser with
--kiosk <link>so it opens automatically. - Press the gear button at the top right of the screen to choose which doors it watches (see below), then Done.
- Turn off screen sleep on the machine, or accept that staff will wake it.
The page needs to reach the panel over the network. Nothing else is required on the machine.
Door filter
A screen watching every door of a large site can be noisy. The gear button opens Show entries from... with a tick box per door. Untick the doors that should not appear (for example the staff back door) and press Done. The choice is saved on that computer only (in the browser), so two screens can watch different doors from the same link, and the list resets after Done so it starts clean with the new filter.
The counts at the top ("scans today", "denied today") follow the same door filter.
Regenerating the link
On Doors > Reception screen, press Regenerate (a change permission on the Doors page). A new secret link is created immediately and the old one stops working: any screen still on the old link shows nothing and must be reopened with the new link. Regenerate when a laptop that had the link is lost or leaves the business, when a member of staff who knew it leaves, or on a routine schedule.
What the screen shows for a denial
A denied scan shows the person (if the fob is known) or "Unknown fob", in red, with the reason code: unknown_fob, fob_revoked, member_inactive, no_access_level or outside_schedule (chapter 11 explains each). This is enough for the desk to say "your membership needs renewing" without opening the panel. The fob code itself is not shown on the screen; look it up in the Log if needed.