Chapter 14
Multi-tenant / provider guide
One Access Controller panel can serve many customers. Each customer is a tenant: an isolated organisation with its own people, fobs, doors, controllers, access levels, schedules, log, staff logins, settings and branding. A super admin (the provider) sees every tenant and can switch into any of them; a tenant's own admins and viewers see only their tenant and do not know the others exist.
The provider's own organisation is also a tenant, marked provider on the Tenants page. It was created when the panel was first installed and owns any data that existed before multi-tenancy.
The Tenants page
Open Tenants (super admins only).
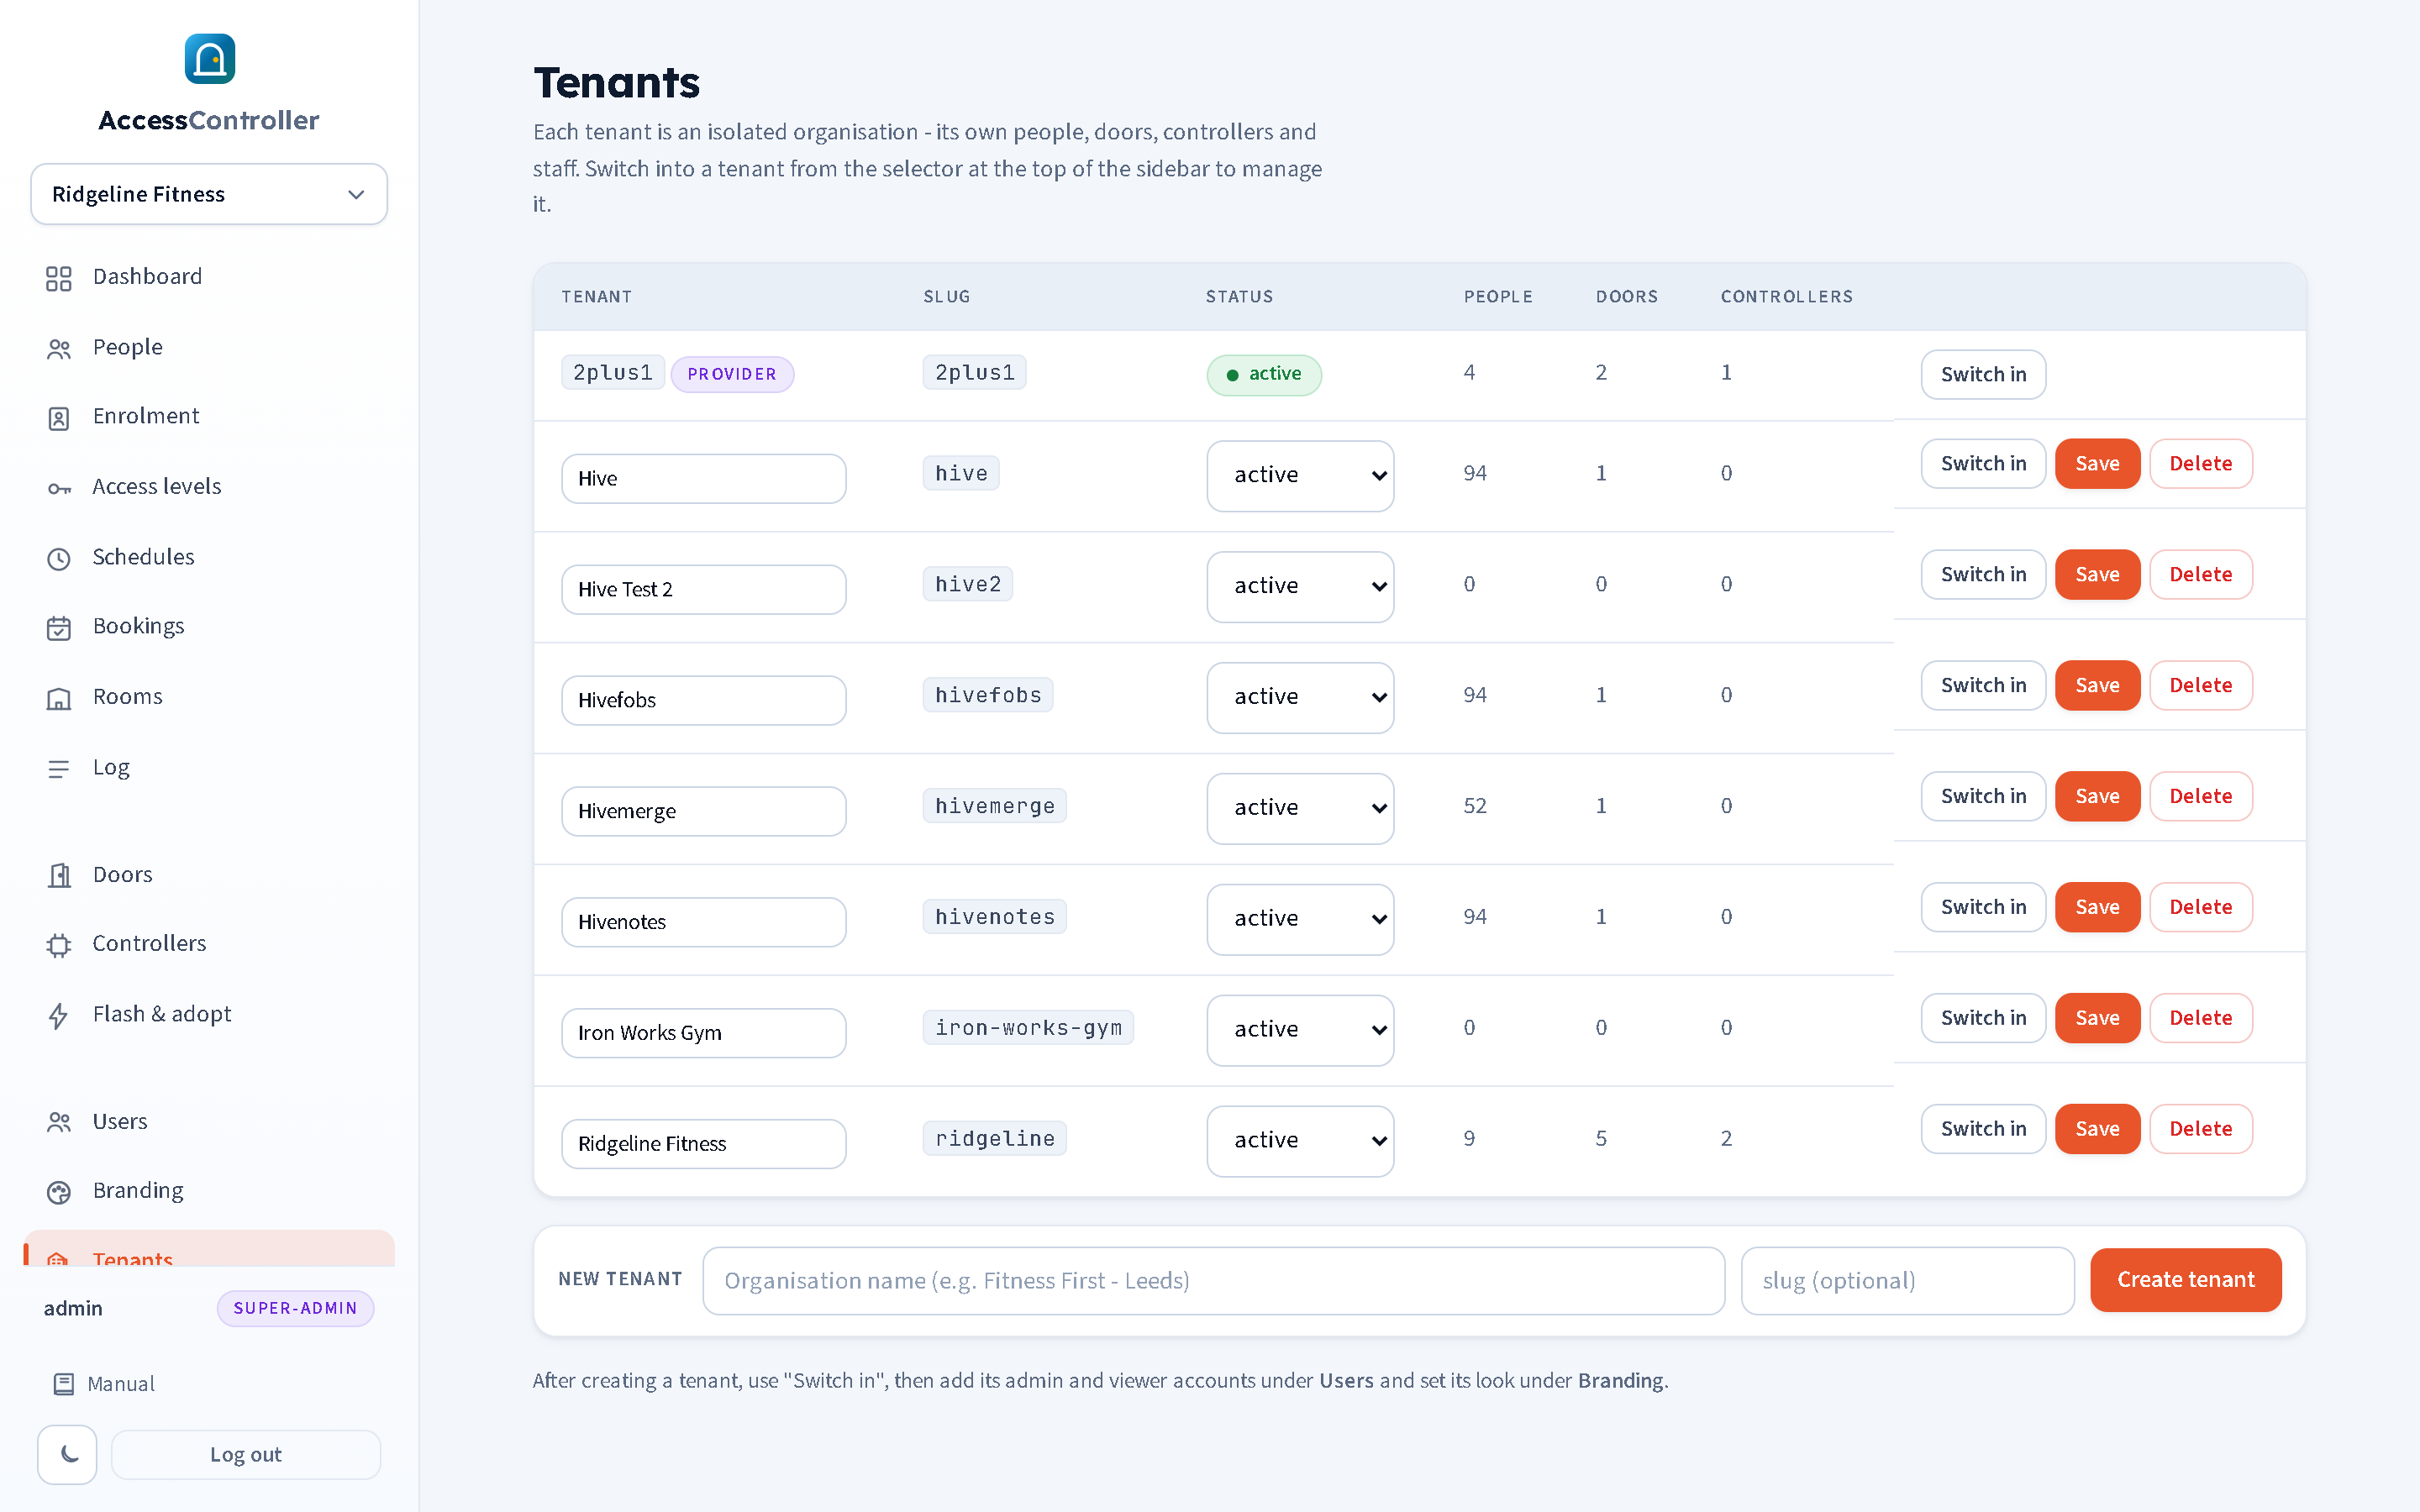
Each row shows the tenant's name, its slug (a short identifier derived from the name, letters, digits and dashes only), its status, and how many people, doors and controllers it has.
Creating a tenant
In New tenant type the organisation name (for example "Iron Works Gym"), optionally a slug (otherwise one is made from the name), and press Create tenant. Slugs must be unique.
Then, in this order:
- Switch in to the new tenant (the button on its row, or the drop-down at the top of the sidebar).
- Users: create the customer's first admin account (and any viewers). Chapter 12.
- Branding: upload their logo and set their accent colour. Chapter 2.
- Settings: enter their controller Wi-Fi, controller type and pin maps. Chapter 13.
- Doors: add their doors. Chapter 3.
- Controllers: register the IDs of the controllers you will fit, then flash and adopt them. Chapter 5.
Everything you create while switched in belongs to that tenant.
Suspending and renaming
Change the name in the row and press Save. Set Status to suspended to mark a tenant as not in service (for example an unpaid account); the status is recorded and shown here. Set it back to active to restore.
Deleting a tenant
Delete removes the tenant and all of its people, fobs, doors, levels, schedules, users and log entries after a confirmation. Its controllers are not deleted: they return to the unassigned pool so they can be reused. This cannot be undone; take a backup first (chapter 16). The provider tenant cannot be deleted.
Switching in
The drop-down at the top of the sidebar lists every tenant. Choosing one scopes the entire panel to it until you choose another; the choice is remembered for your session. The Tenants page row buttons do the same. A message "Now viewing (tenant)" confirms the switch.
While switched in, you act with super-admin rights inside that tenant: you can see and change everything, including its Settings and Users. Changes are logged in that tenant's log where the action is logged at all.
Controllers and the pool
Controllers belong to exactly one tenant, and a controller only ever receives the fobs of its own tenant. New hardware reaches a tenant in one of two ways:
- Register first, then adopt (recommended): switch into the customer, open Controllers, type the controller's ID into Register manually (the ID is printed on the board's serial console at start-up and forms the name of its setup network,
ACS-Setup-xxxxxx=esp32-xxxxxx). When the controller later connects it is already the customer's and just goes online. - Adopt first: a controller that connects before anyone registered it lands in an unassigned pool owned by no tenant, invisible to every customer. The panel has an assign action for super admins to move a pooled controller into a tenant; the current release's Controllers page does not yet show the pool section, so prefer registering first. A controller that was pre-registered in the wrong tenant can be removed there and registered in the right one.
Physical fob codes are unique across the whole panel (the same fob cannot be attached to people in two tenants), which matches real hardware where a fob has one code.
Per-tenant and shared settings
| Per tenant | Shared across the panel |
|---|---|
| People, fobs, doors, controllers, access levels, schedules, log | The panel address controllers adopt to, and the MQTT port |
| Controller Wi-Fi, controller type, channel 1 and 2 pin maps | The public HTTPS URL |
| Enrolment mode window | The phone-unlock API token (one inbound number serves all tenants) |
| Users and custom roles | Controller MQTT credentials (from the server environment) |
| Branding: logo and accent colour | Timezone (from the server environment) |
| Reception screen link | Firmware images staged for Flash & adopt |
Phone access identifies the caller across all tenants from one number, and releases doors in the caller's own tenant. Apartment numbers are matched across tenants too, so two tenants may both have an "apartment 12"; the PIN decides which resident is meant.
Isolation and what to tell customers
- A tenant's admins can see only their own tenant; there is no page that lists other tenants.
- A tenant's controllers hold only that tenant's keyset.
- All controllers connect to the same broker with the same shared device credentials, which is appropriate while the provider owns and provisions all the hardware. If a customer will provision their own controllers on an untrusted network, treat the shared credentials as something you may need to rotate for everyone (chapter 15).
- The reception link and the phone token are secrets; the reception link is per tenant, the phone token is shared.
Commissioning checklist for a new customer
- Create the tenant, switch in.
- Create the customer admin; agree who holds it.
- Branding.
- Settings: Wi-Fi (or note that the site is PoE), controller type, pin maps for the board you are fitting.
- Doors with fail modes confirmed against the fire assessment.
- Register controller IDs, flash and adopt, map to doors, set active. Test a fob, the exit button and the door sensor at each door.
- Schedules and access levels.
- Import or enrol the customer's people and fobs (chapter 6). If they are migrating from a standalone system with no export, plan an enrolment-mode window during staffed hours.
- Optional: reception screen on their front desk; phone access and PBX routing.
- Hand over: the panel address, their admin login, this manual, and the chapter 17 checklist for "controller offline".